Below are instructions for installing the portal for STB and Smart TV on a server with Debian OS, as well as for setting up its interaction with the Smarty Lite server. You can find information about configuring certain features and changing the behavior of the portal here: link.
You will need SSH access to the server with root privileges. Installation will be done in console mode via terminal commands. If you need to run the sudo command to gain root privileges, you must run the following command before starting the installation:
sudo suIt is assumed that the portal is installed on the same server where the Smarty Lite server is already installed, otherwise errors will occur at the nginx configuration step due to the lack of Smarty Lite settings.
Installing the nginx web server
The portal is a static single page site consisting of html/css/javascript files. To host the portal, you can use the nginx web server with a basic configuration for statics distribution.
Install dependencies using apt:
apt update
apt install nginx-common nginx nginx-extras
Installing Portal Packages
The portal consists of two types of installation packages:
mw-engine-*.deb— the main code of the portal and the mechanisms of interaction with the device.mw-template-*.deb— interface template.
For the portal to work, it is necessary to install both mw-engine and some mw-template-*, you can install several different interface templates mw-template-*.
You can learn about the features and capabilities of various portal interfaces on this page: link.
Portal installation packages can be downloaded in your personal operator account in the same way as Smarty Lite packages.
Warning! Always use the latest version of
mw-enginealong with the latest versions ofmw-template-*as backwards compatibility is not guaranteed between these packages when new versions of the portal are released.
Also, when updating Smarty Lite, it is recommended to update the portal to the latest version as well, since there may be changes in the API that are not supported in the old version of the portal.
Next, install the portal packages, for example we will configure the templates futuristic and impuls:
dpkg -i mw-engine_*.deb
dpkg -i mw-template-*.deb
When an error occurs
dpkg: warning: 'ldconfig' not found in PATH or not executable
dpkg: warning: 'start-stop-daemon' not found in PATH or not executable
run the following command:
export PATH=/usr/local/sbin:/usr/local/bin:/usr/sbin:/usr/bin:/sbin:/binAfter that, try to install the packages again.
Preparing nginx web server configuration
Activate the nginx portal configuration and disable the default configuration:
ln -s /etc/nginx/sites-available/portal /etc/nginx/sites-enabled/portal
rm /etc/nginx/sites-enabled/default
By default, the portal connects to the full version of Smarty, so the default configuration uses the name smarty. For Smarty Lite, change it to smarty-lite using the following command:
sed -i -e 's/smarty/'smarty-lite'/g' /etc/nginx/sites-available/portalCreate a directory for nginx cache and logs:
mkdir -p /var/cache/nginx
mkdir -p /var/log/nginx/microimpuls/portal
Set the correct permissions for the directories for logs and file uploads in Smarty:
chown -R www-data:www-data /usr/share/nginx/html/microimpulsRestart nginx with current settings:
/etc/init.d/nginx restartConnecting the portal to Smarty Lite
The portal interacts with the Smarty Lite server using API. Connection data is specified in the portal configuration file /etc/microimpuls/portal/client.js.
After the installation of Smarty Lite is completed and the command setup_initial_data is run, the first statement is created in Smarty with Client ID = 1 and a random API key value is generated. This value can be viewed in the Smarty Lite control panel in the «General Settings» → «General Client Settings» section in the «TVMW API key» field:
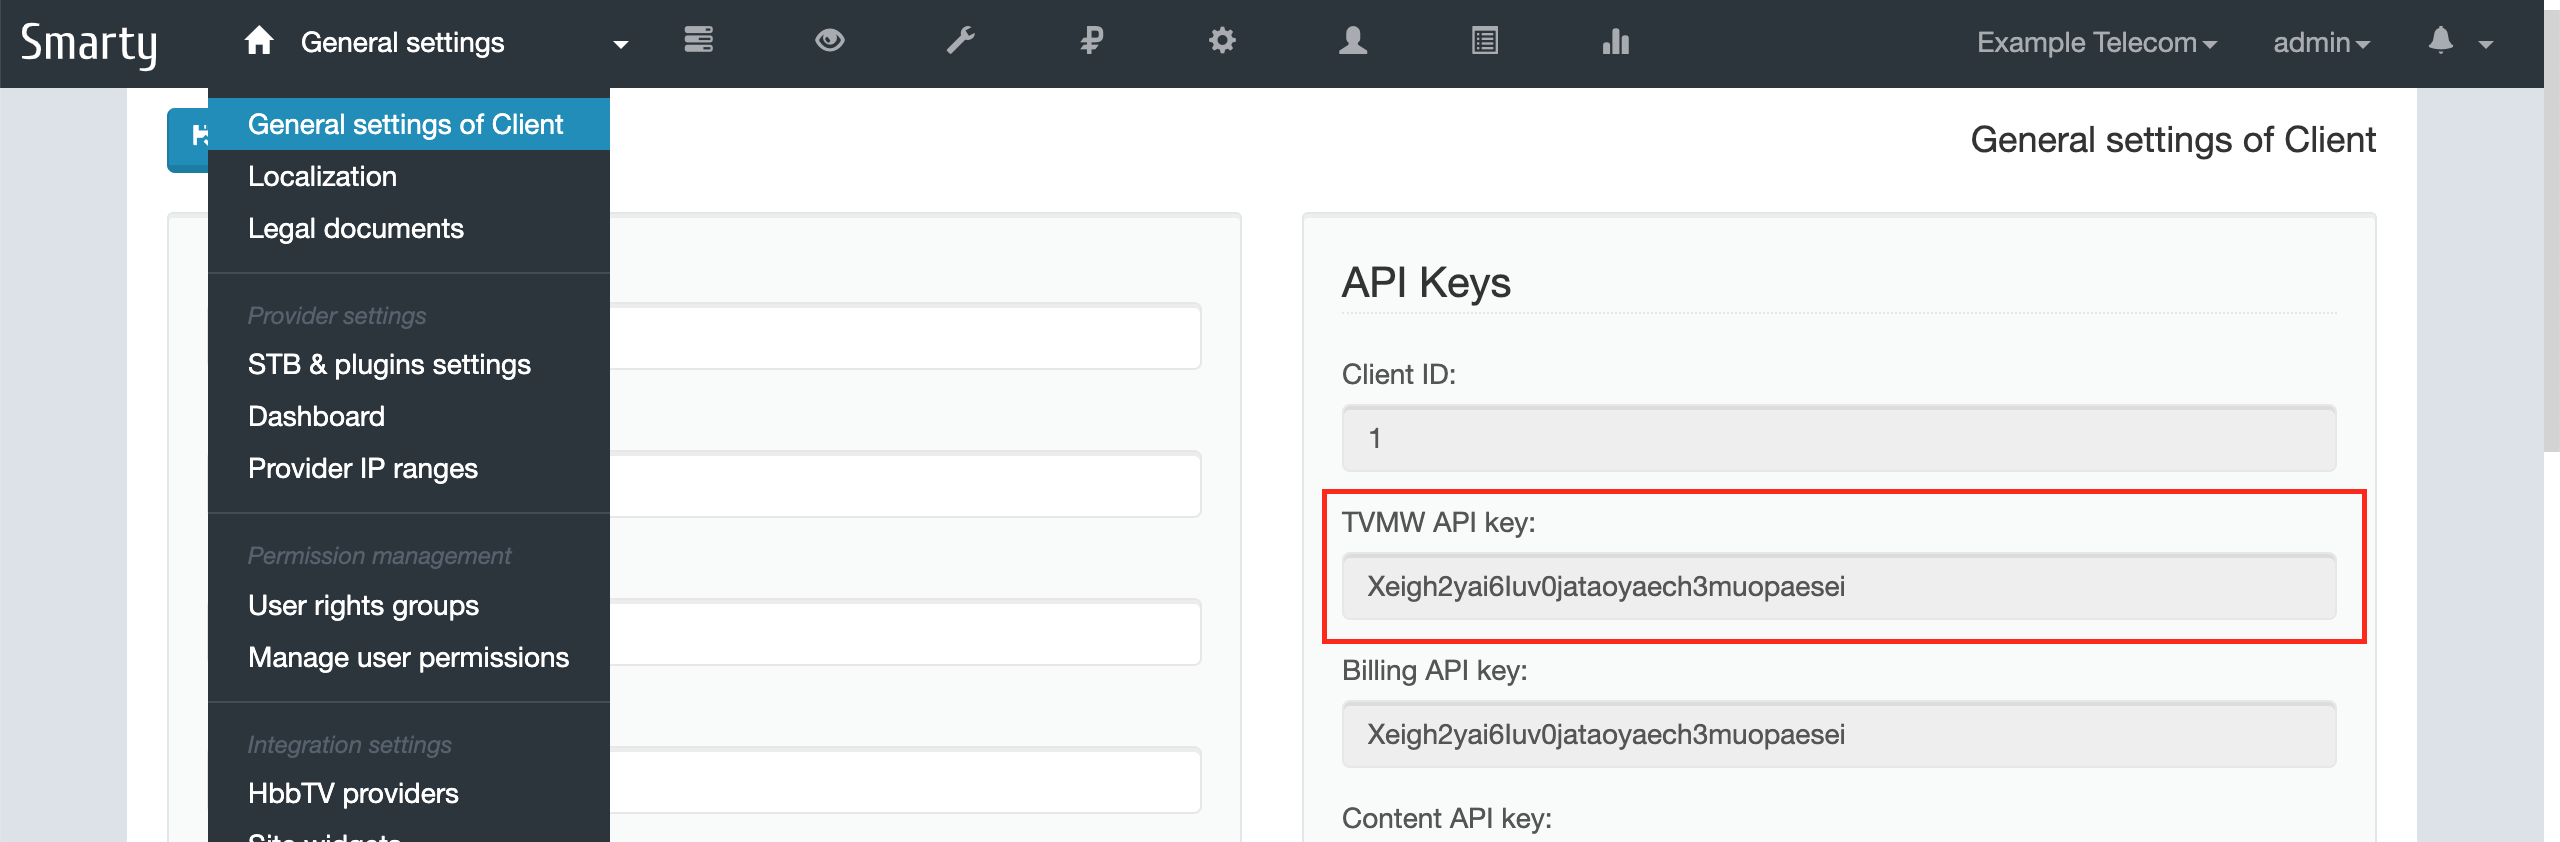
Copy this value (in this example: Xeigh2yai6Iuv0jataoyaech3muopaesei9eithah1eichi9OP5ce1hee0hei9Ma) and paste it into the api_key field in the portal configuration file /etc/microimpuls/portal/client.js:
sed -i -e 's/PUT API KEY HERE/'07cbf5f6610149c987ed648bb86be7b3'/g' /etc/microimpuls/portal/client.jsThe default nginx configuration has a special location /api that directs API requests to the Smarty Lite uwsgi socket, so you can leave the default api_url parameter value unchanged.
You can find out more about options for connecting the portal to Smarty and other settings on this page: link.
After that, open the portal in a browser to check if the configuration is correct by entering the server’s IP address (port 80 by default). If everything is done correctly, then you should see the authorization screen:
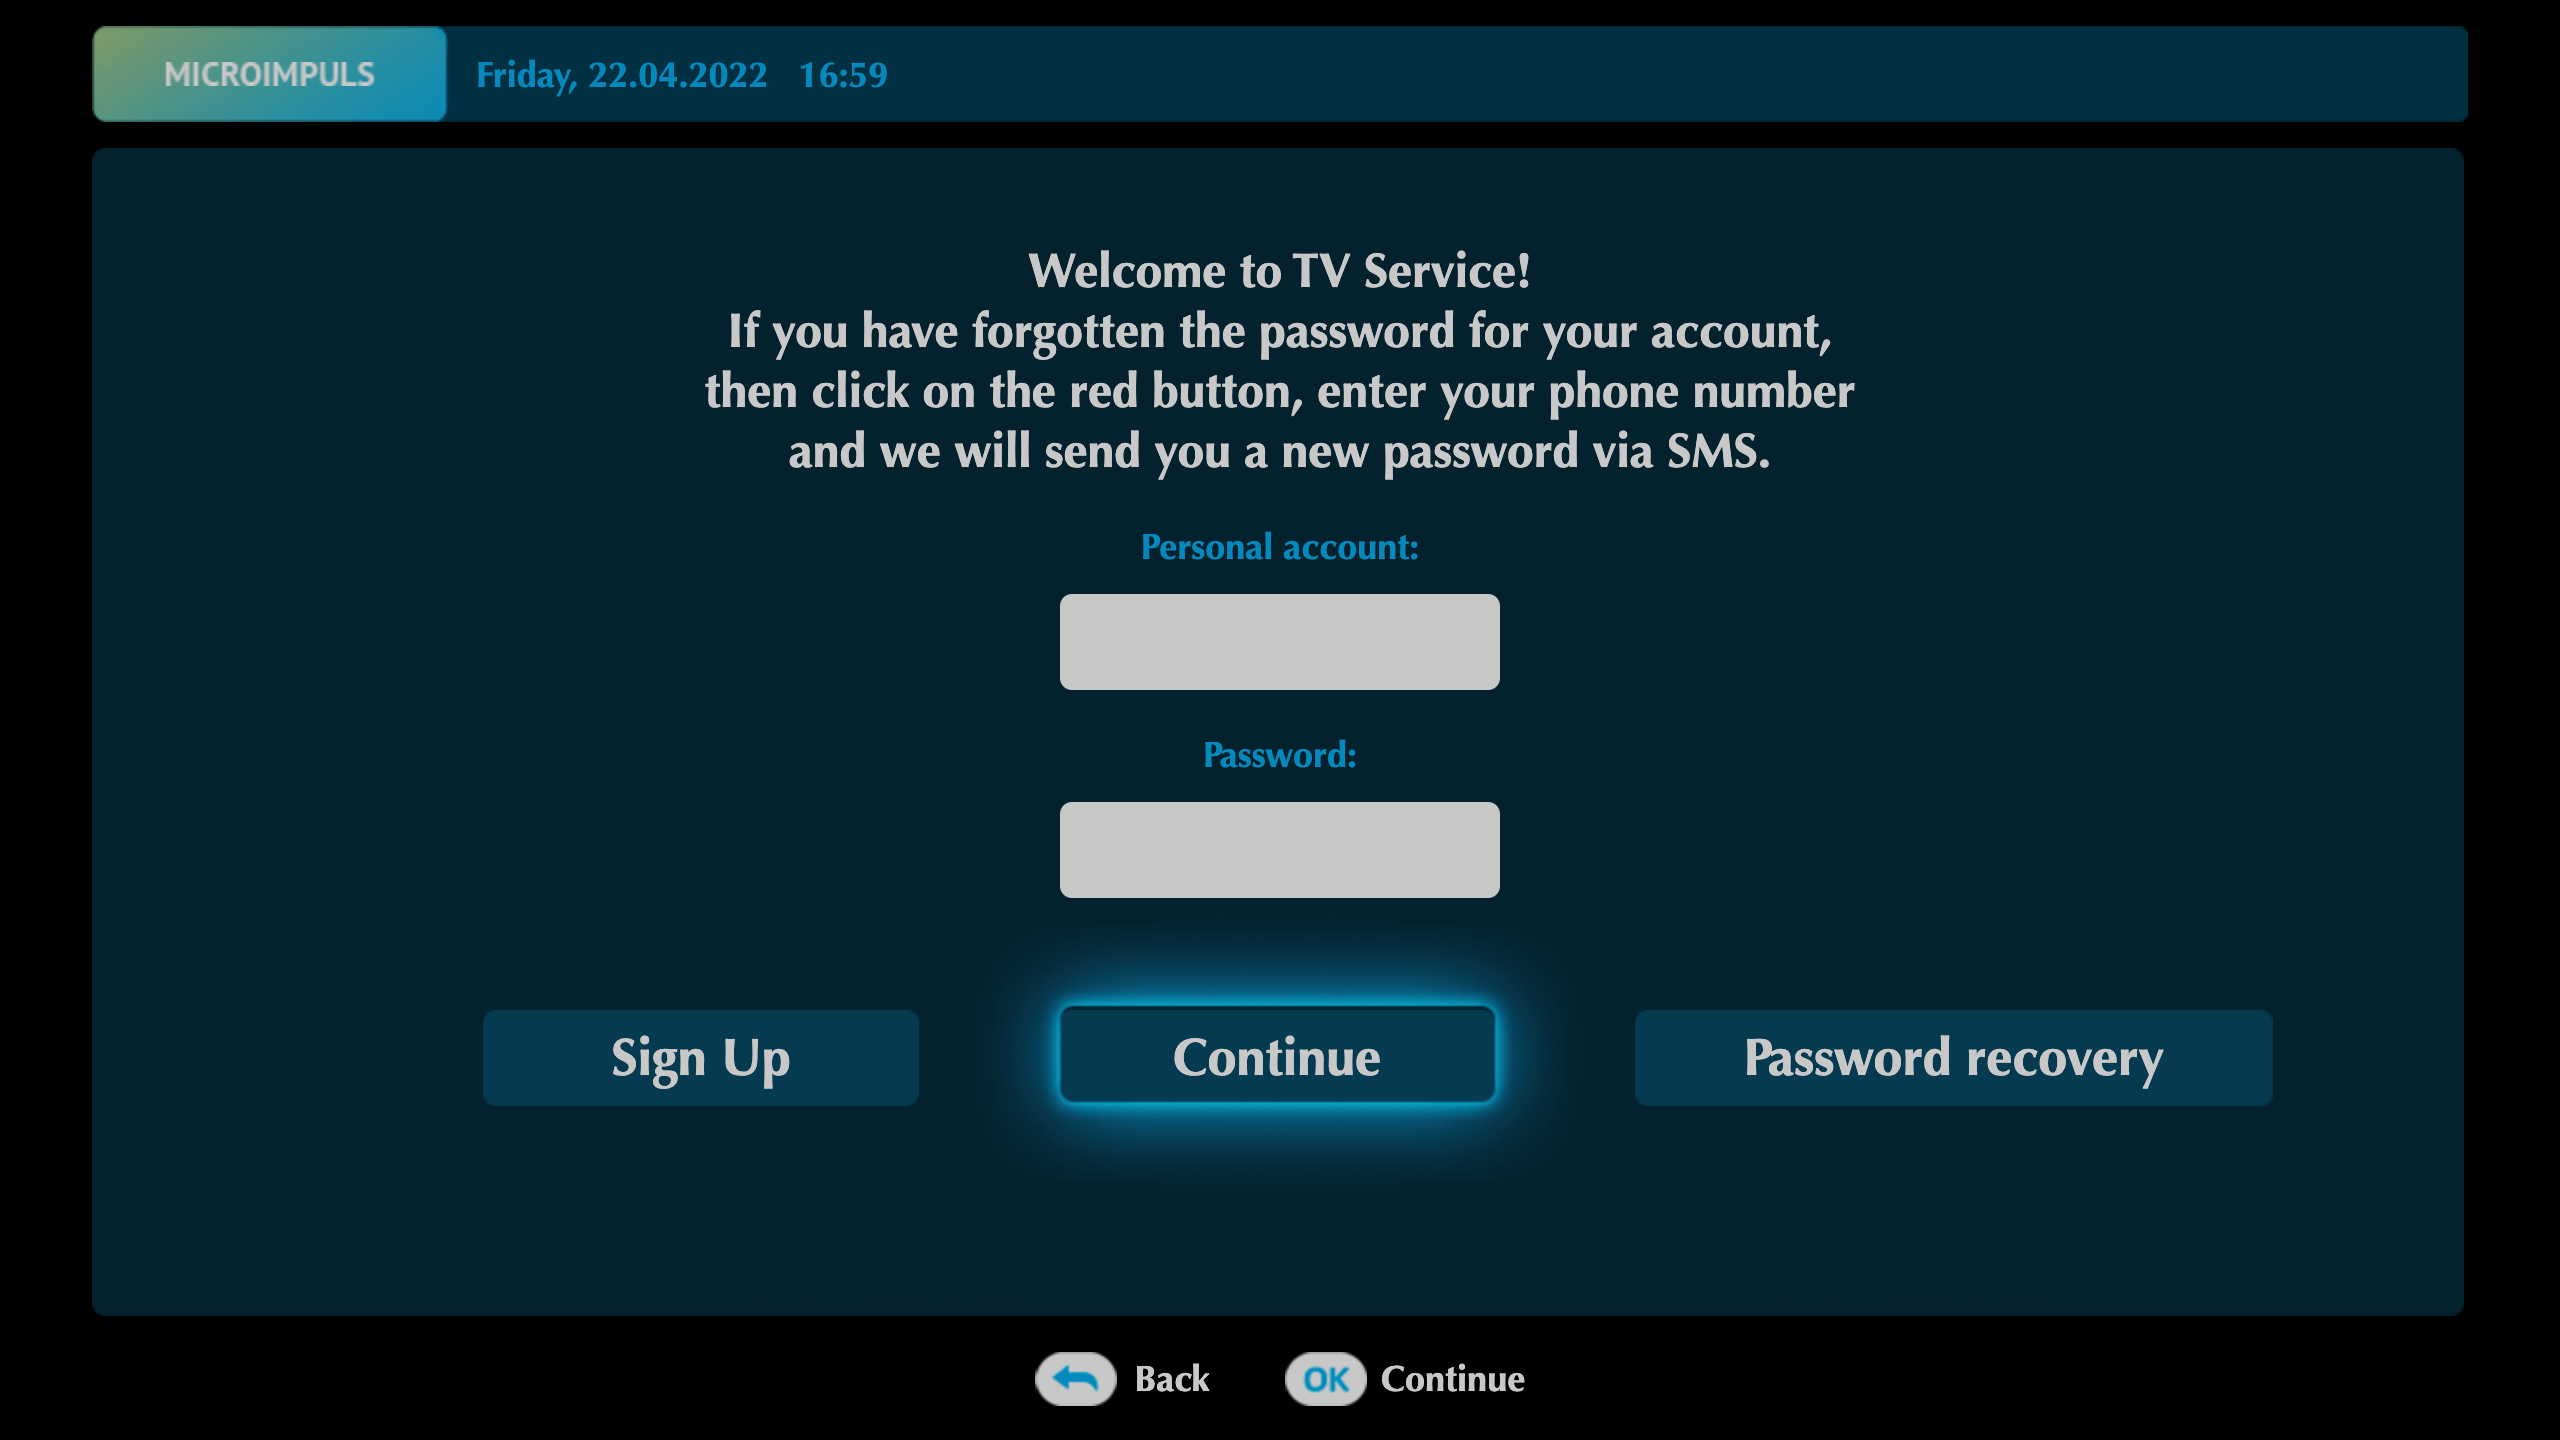
To log in, use the demo account login and password 123 : 123.
To open the portal on the set-top box, specify the same portal address in the device settings as in the browser.